Users logged in with the built-in administrator ID can use Design mode to change field labels on a form and specify which fields are mandatory. Note that the Design function is not available in all module forms in the web application; if you want to change field labels and the Design button is not available, you can use the desktop application to make the change.
To use design mode:
1. Click Design on the form. The Design form lists all fields on the form.
2. Change the Label Text as desired.
3. For each field you want to make mandatory on the form, select the check box in the Mandatory column.
4. For any field that you do not want to appear on the iTrak interface, select the check box in the Hidden column.
5. Optionally, specify Default Text for field labels.
6. The Custom Validation column (currently only available on the Subject form), allows you to define custom field validation rules to control data entry or formatting (described below).
7. Click OK to close the form.
Field validation rules (available on the Subject form only) allow you to control the types of data entered into text, date, email, and zip code fields (i.e. not fields that have a dropdown list or check box options).
Examples: text must not include numbers; phone numbers must be in a given format; a date must be before (or after) a specific date, etc. Some errors will result in a customizable message to the user to prompt correct entry, while other rules direct iTrak to automatically format the data (e.g. with an initial capital letter).
The Design form includes an additional Custom Validation column; each field that can have validation rules displays True (if validation rules have been defined for that field) or False.

Click the … button to the right of the field to access the rule options. Options vary depending on the field type:
Validation Rule Type |
Procedure |
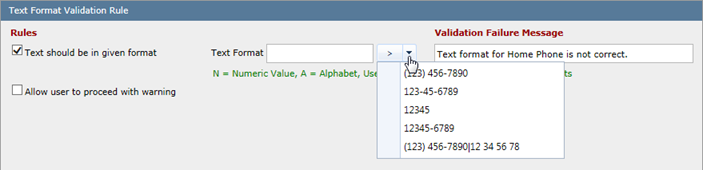
Text Format |
|
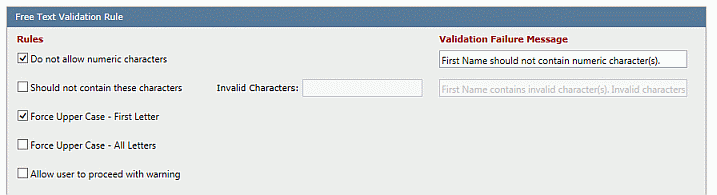
Free Text |
|
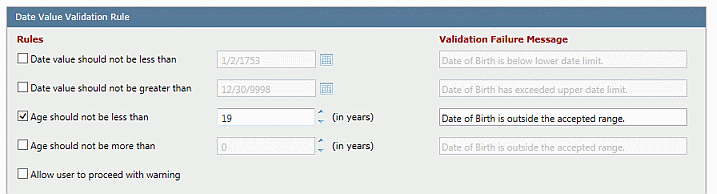
Date |
|
|
|
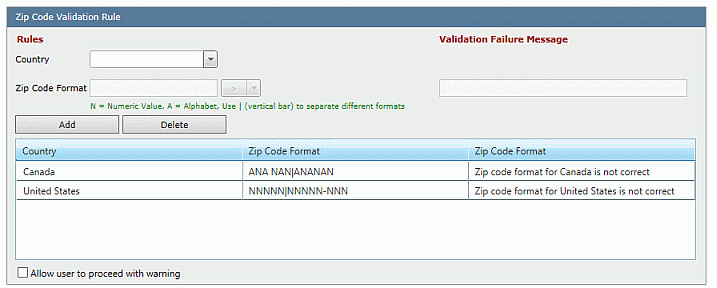
Zip Code |
There can be different rules according to the Country selected in the profile. For each country:
|
All rule types include an option to allow the user to proceed with a warning even if their input does not pass the validation rule.