Each iTrak system that you plan to share subject profiles with must be defined in your iGNet Plus module as an iGNet Contact.
Note that an iGNet contact is not the same as an iTrak contact.
Either party may initiate the process to set up the contact, but both parties must be involved to exchange their encryption keys. The recipient may reject a contact request if they do not want to share subject data, or if the system was compromised or they don't recognize the email or person that sent the contact request.
Once iGNet Plus contacts are established, you must define at least one iGNet Group. A group can contain more than one contact, and a contact can be included in more than one group. When a user wants to share a subject profile, they choose the group to send it to.
For easier reading, the initiator is written as "you". There may be occasions when you are the recipient of a contact request.
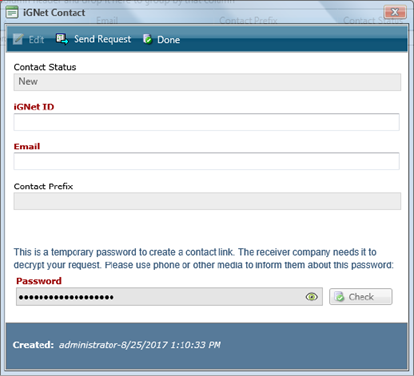
1. On the iGNet Contact tab, click New. Show example
2. In the iGNet
ID field, enter a name for the company that you want to communicate
with (e.g. “Company B”).
Note This
is just a name for your own reference to identify the other party - it
does not have to match what they have in the field of the same name in
their own iGNet settings.
3. Enter the dedicated iGNet Plus Email address for the recipient (e.g. "ignet@companyB.com").
A random 16-digit number is created as a temporary password. This password will be used only once for exchanging public keys between the two iGNet Plus peers. Upon receiving the contact request, the recipient will call you to ask for this password.
4. Click Send Request. The system will send a “Contact Request” email to the recipient's iGNet Plus email account. If the email is sent successfully, the form closes and a new row appears in the iGNet Contact grid with the status “Requested”.
The recipient can either wait for emails to be automatically retrieved (at the specified interval set up in her own iGNet Plus settings), or she can click Load Emails on the iGNet Contact tab. Once the email is received, a new row appears in iGNet Contact grid in her system.
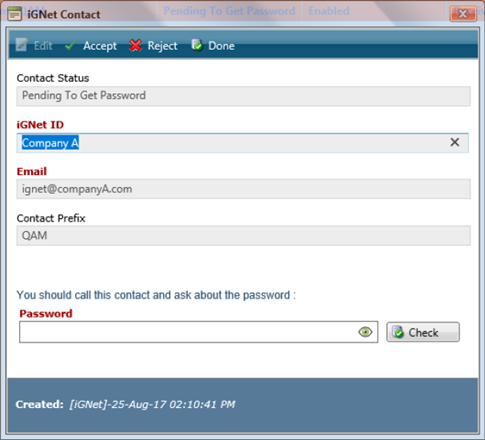
1. The recipient opens the new contact request. A similar “iGNet Contact” form opens. Show example
2. The recipient clicks Edit and then:
o To reject the contact request, click Reject and then click Done to close the request form.
o To accept the contact request, call the initiator to get his password.
When the recipient calls for the password:
1. Navigate back to iGNet Contact tab and open the contact request.
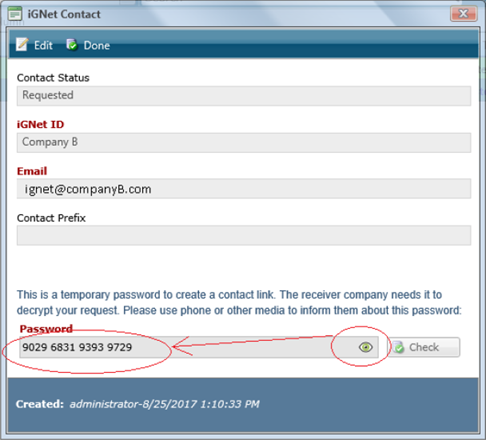
2. In the Password
field, click  to make the password visible. Show
example
to make the password visible. Show
example
3. Provide the 16-digit password to the recipient over the phone or by text. The spaces between numbers are arbitrary and are only displayed for legibility.
4. Click Done to close the request form.
The recipient opens the contact request and enters the Password, then clicks Accept. If the password is correct, the recipient's system decrypts and saves the public key belonging to the initiator.
From this point onward, no further action is required from either party. The two iGNet Plus systems exchange two emails automatically to complete the transaction:
§ The recipient's system sends a message to the initiator's system with the recipient's public key, encrypted with the same password. The iGNet Contact form closes and the status of the contact request in the iGNet Contacts grid changes to “Accepted”.
§ On the initiator's
system, the status of the contact record changes to “Completed” and its
colour changes to green. The recipient's assigned Prefix is displayed
- this will be attached to any incident number associated to subject profiles
sent from that recipient to identify their origin.
A "contact request complete" message is returned to the recipient's
system. Upon receipt of this last message, the contact record in the recipient's
system also changes to "Completed".
These iGNet Plus emails are transmitted according to the Frequency set in each party's iGNet settings. Each party can either wait for the system to send and receive emails, or they can click Load Emails on the iGNet Contact tab to force the email check.
At this point, the contact connection between the two systems has been established, but you cannot send data to the contact until they have been added to an iGNet Group.
In order to send subject data, you must define one or more iGNet Group. A group can contain more than one contact, and a contact can be included in more than one group. When a user wants to share a subject profile, they choose the group to send it to.
1. On the iGNet Group tab, open an existing group to add the contact to, or click New to create a new group.
2. Click Add and select the iGNet contacts you want to include.
3. Click OK.