The Document Control tab in a record allows you to:
§ Assign the owner of the record (the person who can modify this tab). The owner defaults to the person who created the record, but you can assign ownership to another user, for example when you have finished your part in the process and another user is responsible for further modifications or investigation.
§ Archive the record so that no other edits can be made to the entry (not even by the Administrator). This is typically done at the end of a shift or certain time period to indicate that the entry has been completed and no other actions are required. Record status must be "Closed".
§ Add a password to the record or make the record exclusive to (only visible to) specified users or roles. This can be used, for example, if an internal investigation is under way and you want to prevent other users from seeing the details of the record.
§ Mark a record as exclusive (to yourself, to anyone with the same role as you, or to anyone with a particular role).
Incident records use Share With function instead (as described below), which provides more control to what a user can do with the record. For example, users with a particular role may be able to edit the record, but those with another role can only view the record, or an individual user may be able to add new information to the record.
Open the entry from the grid and click the Document Control tab.
§ To change the assigned owner, click Assign Owner and select the user who will now have control over this record's access.
§ To archive a Closed entry, select Make record archived. Archiving a record cannot be undone.
§ To assign a password to the record, select Make record password protected. You are prompted to enter the password. To remove the password, clear this check box.
To make the record exclusive, click one of the following buttons:
§ Make
Exclusive – Displays the Exclusion List. Select the roles and/or
individual users to whom you want to grant access to this record. The
entry will be hidden from all other users (except administrators with
ByPass Protection permission).
§ Make Exclusive To Me – Makes the entry visible to only the current user (and administrators with ByPass Protection permission).
§ Make Exclusive To My Role – Makes the entry visible only to users who share the current user's role (and administrators with ByPass Protection permission).
§ Make Non-Exclusive – Clears the exclusive list.
To remove all exclusivity from
the record, select Make record global.
A global entry is visible to all users at all properties, but only to
the degree that their level of permissions allows.
If there is no exclusivity and the record is not marked as global, only
users who have permissions in the owner's department will have access
to the record.
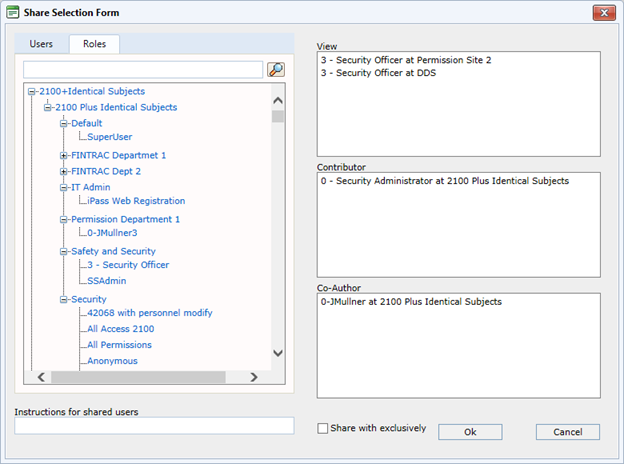
1. To define who has access to an incident record, click Share on the Document Control tab.
2. To share the record
with individual user(s), on the Users tab,
type the first letter(s) of the user name.
The list filters as you type. Drag a user name to one of the three boxes
on the right.
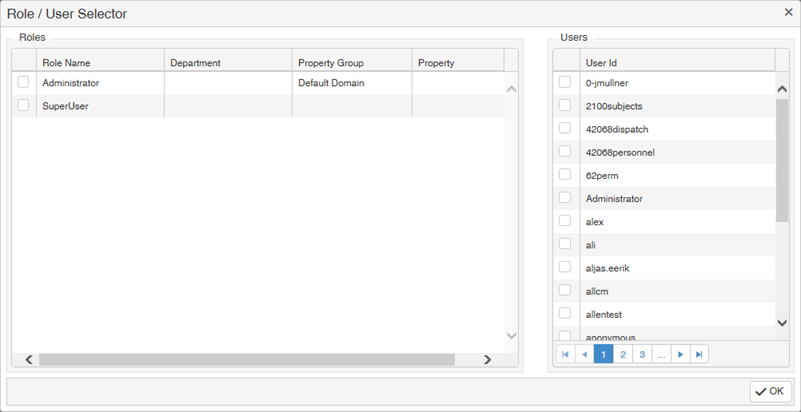
To share the record with users with a particular role, on the Roles tab
locate and drag the role to one of the boxes on the right. Click
the green text to see what each allows/requires.
o View allows the user/role to view the record only.
o Contributor allows the user/role to modify existing data in the record.
o Co-Author allows the user/role to add new data to the record.
3. Add any instructions to the shared users.
4. If you want to allow only the people on the share list to access the record, select Share with Exclusively. Even if a user has the necessary permissions to view the record, if the record is shared exclusively and the user is not included on the list, he/she will not be able to access the record.
5. The sharing permission expires according to the period set in the Share With settings. You can set the sharing separately for each user/role to never expire, or to expire when the incident is closed or on a specific date. Double-click on the user/role to change the properties.
6. Click OK to save the sharing information.
A briefing log is created for each user the record is shared with (either explicitly or by means of their role). The briefing log includes the share level (view, contributor, or co-author), expiry date, and any instructions. All sharing history is recorded on the Document Log tab of the incident record.