To create a daily log entry:
1. Click ![]() Daily Log on the Shortcuts bar
to display the Daily Log window.
Daily Log on the Shortcuts bar
to display the Daily Log window.
2. Click New. The Daily Log Entry form appears. The iTrak system maintains the Primary Operator Daily Log Number and Action.
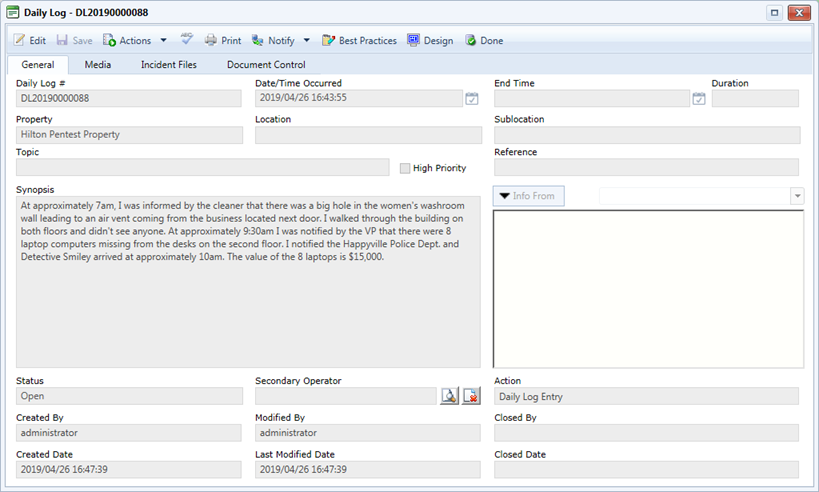
3. Enter the Property, Location, Sublocation, Topic, Info From and Synopsis as required.
4. Provide the following information:
Field |
Description |
Date/Time Occurred |
The time and date the daily log entry was created. This defaults to the time and date when the initial log entry is created. This date can be overridden (changed) by simply selecting the dropdown and choosing the required date. The time can be overridden by simply selecting the time with the mouse and entering the required time and time of day (a.m. vs. p.m.). To update the occurrence time to the current time and date, click Now. |
End Time |
The date and time the events described in the daily log entry ended. Click Now to use the current date and time. |
Daily Log Number |
This number is automatically created and maintained by the iTrak System. It consists of the letters DL (Daily Log), the year and the log entry. You cannot change this number. |
Property |
The property to which a daily log applies. This defaults to the property associated with your log in, but you can select a different property. |
Location |
The property location of the log entry, such as Casino Floor, Lobby, etc. This information is unique and is configured for each iTrak installation. |
Sublocation |
The property sublocation of the log entry. This sublocation is directly related to the selected Location. This information is unique and is configured for each iTrak installation. |
Topic |
The topic of the daily of the daily log entry. |
Reference |
Enter any specific reference information such as police file #, camera # or any other information relevant to the daily log and business. |
Synopsis |
A brief description of the log entry. |
High Priority |
Indicates whether the log entry is of high or normal priority. |
Info From |
The individual (personnel, contact, subject) or company who reported the activity. This field stores a list of recently selected individuals for each user on the system. Click Info From to add a new name, or click a name that was already added to open their profile record. |
Incident Files |
Shows if there are have been any incident files or related incident files created for the daily log entry. |
Action |
Indicates whether a daily log entry has been escalated to an incident file. |
Status |
Indicates the status of the daily log entry (open/closed/pending). |
Secondary Operator |
Optionally, select a second operator for the daily log entry. This can be useful if another user on the system is editing or changing a daily log entry. |
5. If the situation requires immediate personnel response, choose Actions » Create Dispatch. For more information, see Creating a Dispatch.
6. If the daily log entry requires further in-depth incident reporting, e.g. to further document an incident such as a fire, lost property, banned subject, etc., choose Actions » Create Incident. For more information, see Creating an Incident. Depending on your settings, you may be prompted to include any media attached to the daily log.
7. Save the entry, or mark it as Done, or click the red "X" to discard it.
If your user settings are set to Auto Create a Daily Log:
o If the log was newly created and you click Done, the record is saved and a new Daily Log window appears.
o If the log is new but you click Save, the form stays open until you click Done or the red “X” button to close; in this case a new Daily Log will not appear.
o If the log is not new, when you click Done the record will simply close.